
Check your network settings
How to set your IP address and DNS server to "obtain automatically" – the most common reason a connection does not work.
Your device needs to get its IP address and DNS servers automatically from the network (DHCP). If it doesn't, you'll get no address or the wrong one, and the connection won't work.
Windows
Set automatic IP assignment on Windows 10/11
This path is identical on Windows 10 and Windows 11.
-
Open network connections
Press Windows key + R, type
ncpa.cpland press Enter. -
Open connection properties
Right-click your LAN connection ("Ethernet"), then Properties.

-
Open IPv4 properties
Select Internet Protocol Version 4 (TCP/IPv4) and click Properties.

-
Set automatic assignment
Enable Obtain an IP address automatically and Obtain DNS server address automatically, then confirm with OK.


Restart your computer afterwards so the connection is established cleanly.
macOS
-
Open network settings
Go to Apple menu → System Settings → Network and click your Ethernet adapter in the list.
-
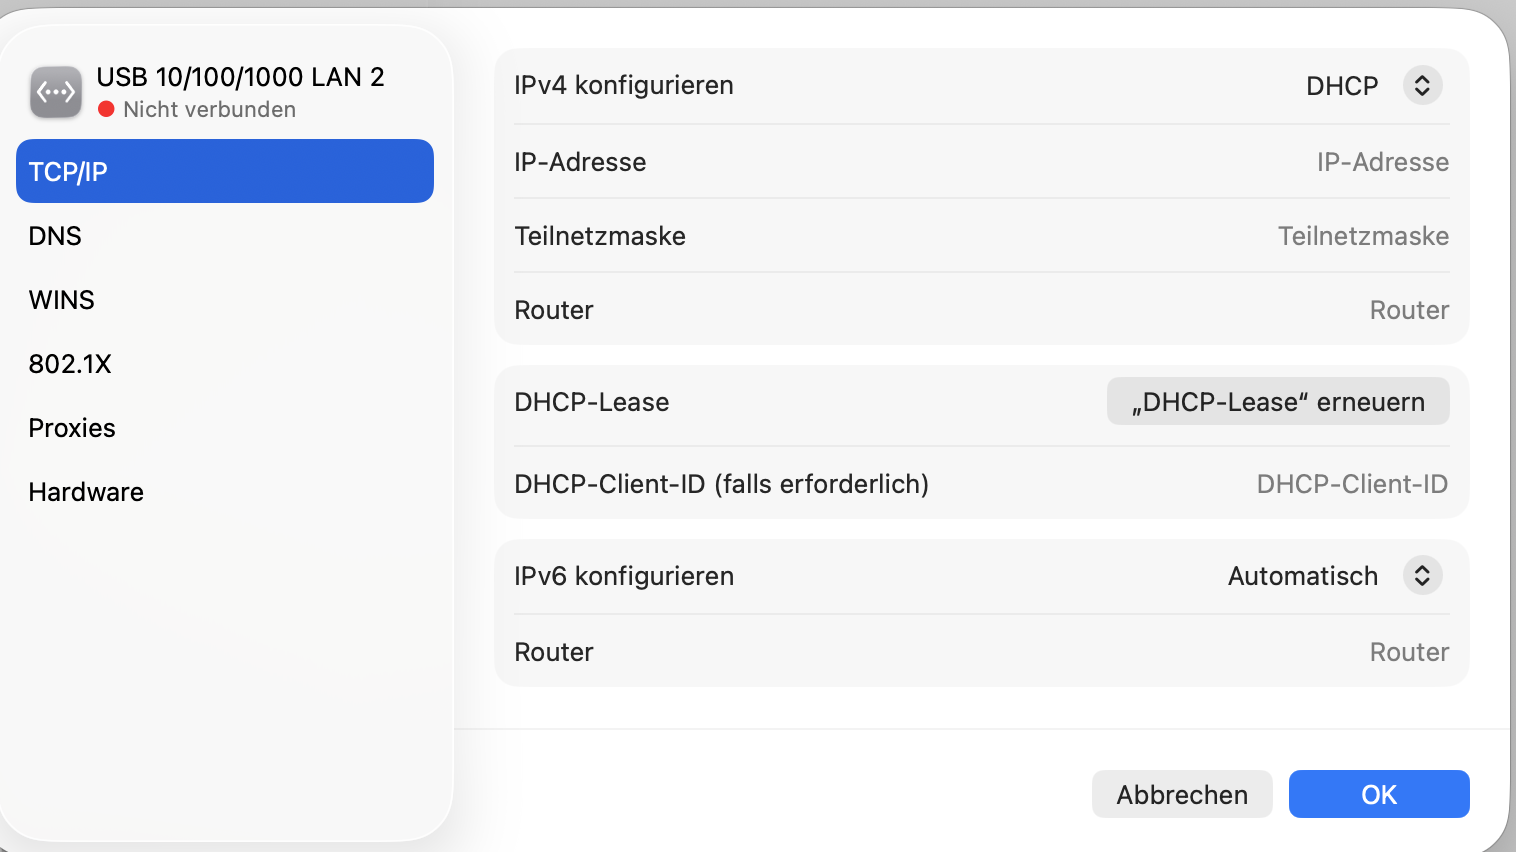
Set IPv4 to DHCP
Click Details …, then TCP/IP on the left. Configure IPv4 must be set to DHCP – that is the default. If you changed anything, confirm with OK.

Linux
Network settings must be obtained automatically via DHCP. On most distributions this is the default as soon as a DHCP client (e.g. NetworkManager or dhcpcd) is active. Check your network manager to make sure the connection isn't configured with a static IP address.